Now this is a quilt I have wanted to make for a couple of years. I've had the fabric since early 2012 when I bought two charm squares of Bonnie & Camille's Ruby fabric. (I'm using the other one to make a dresden table runner . . . more fun to come!!) Then it all sat in a bag just percolating in my mind. I looked online, on Pinterest, at books, at quilt stores for the pattern I wanted to make and just couldn't find the exact one I had in my mind, so I got out graph paper and created a pattern and I'll share it with you if you're interested. I always appreciate when people post things online that everyone can use. Its easy, you know, because I could do it, and it turned out sweet and lovely like I wanted, thus I'm calling it the Sweet Love Baby Quilt. You could just as easily switch the charm squares to make it for a baby boy also.
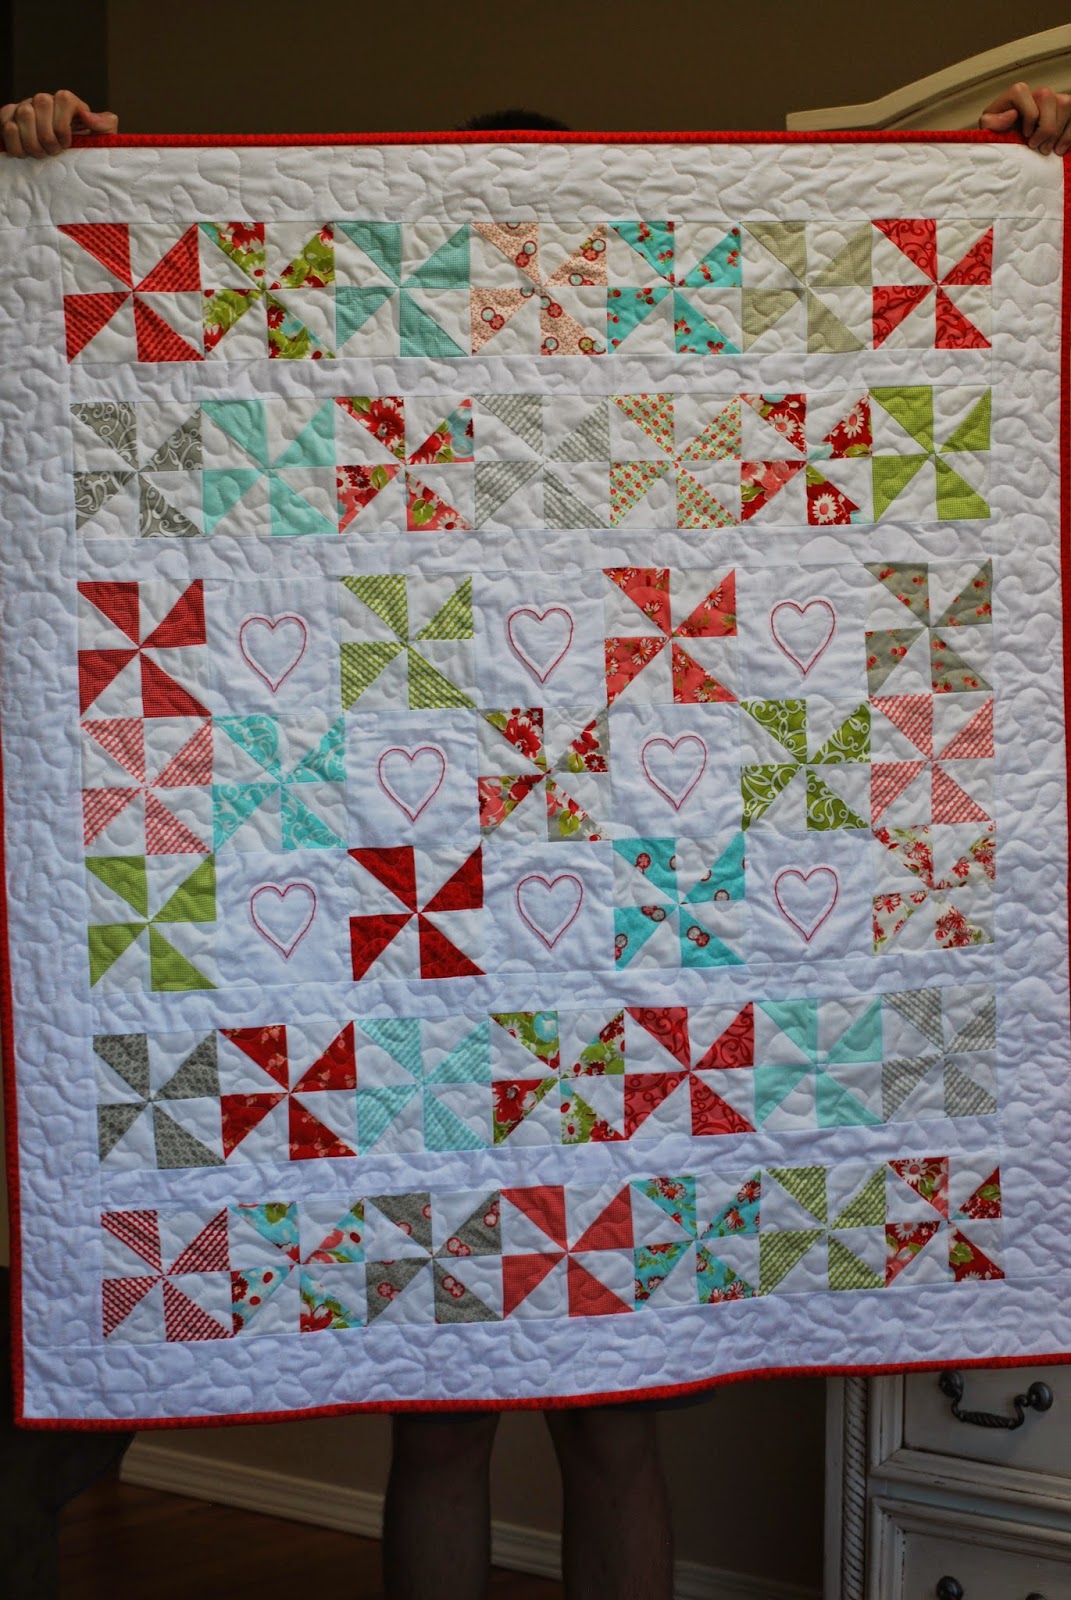

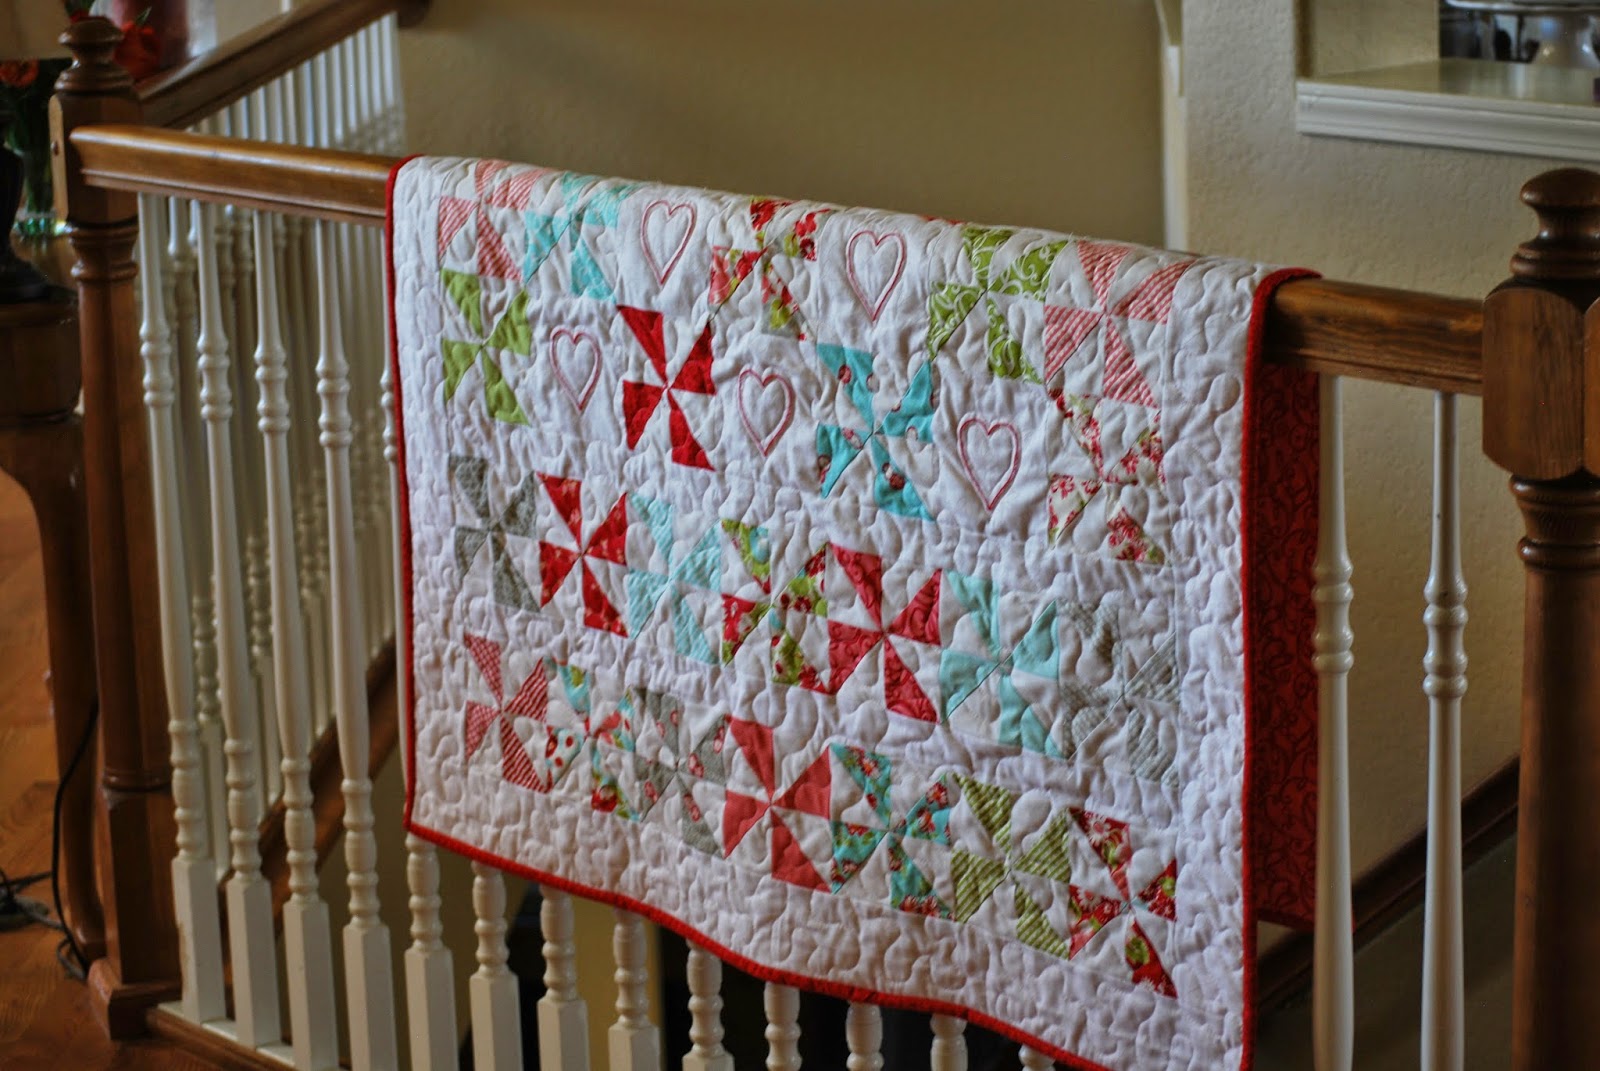
Sweet Love Baby Quilt - finished size 42" x 47"
Fabric Requirements:
1 charm pack of any patterned fabric line or 41 5" x 5" pieces
1 charm pack of white fabric, making sure there are at least 41 pieces
1 1/2 yards coordinating white fabric - Out of this cut the following:
Rotary cut a folded 5-1/2" strip of this fabric
Cut this into (8) 5-1/2" x 5-1/2" squares
Cut (4) 2-1/2" strips - Each of these will need to be 35" long
Cut (5) 3-1/2" strips -Two of these will need to be 35" long
With the other Three, make Two 47" long strips
1 1/2 yards of backing ( I bought 2 but there was plenty of left overs)
1/2 yard of binding, cut into 2-1/2" strips
Notions Needed:
Embroidery thread, check to make sure it doesn't bleed
Embroidery needle
Instructions: (Read all directions before you begin)
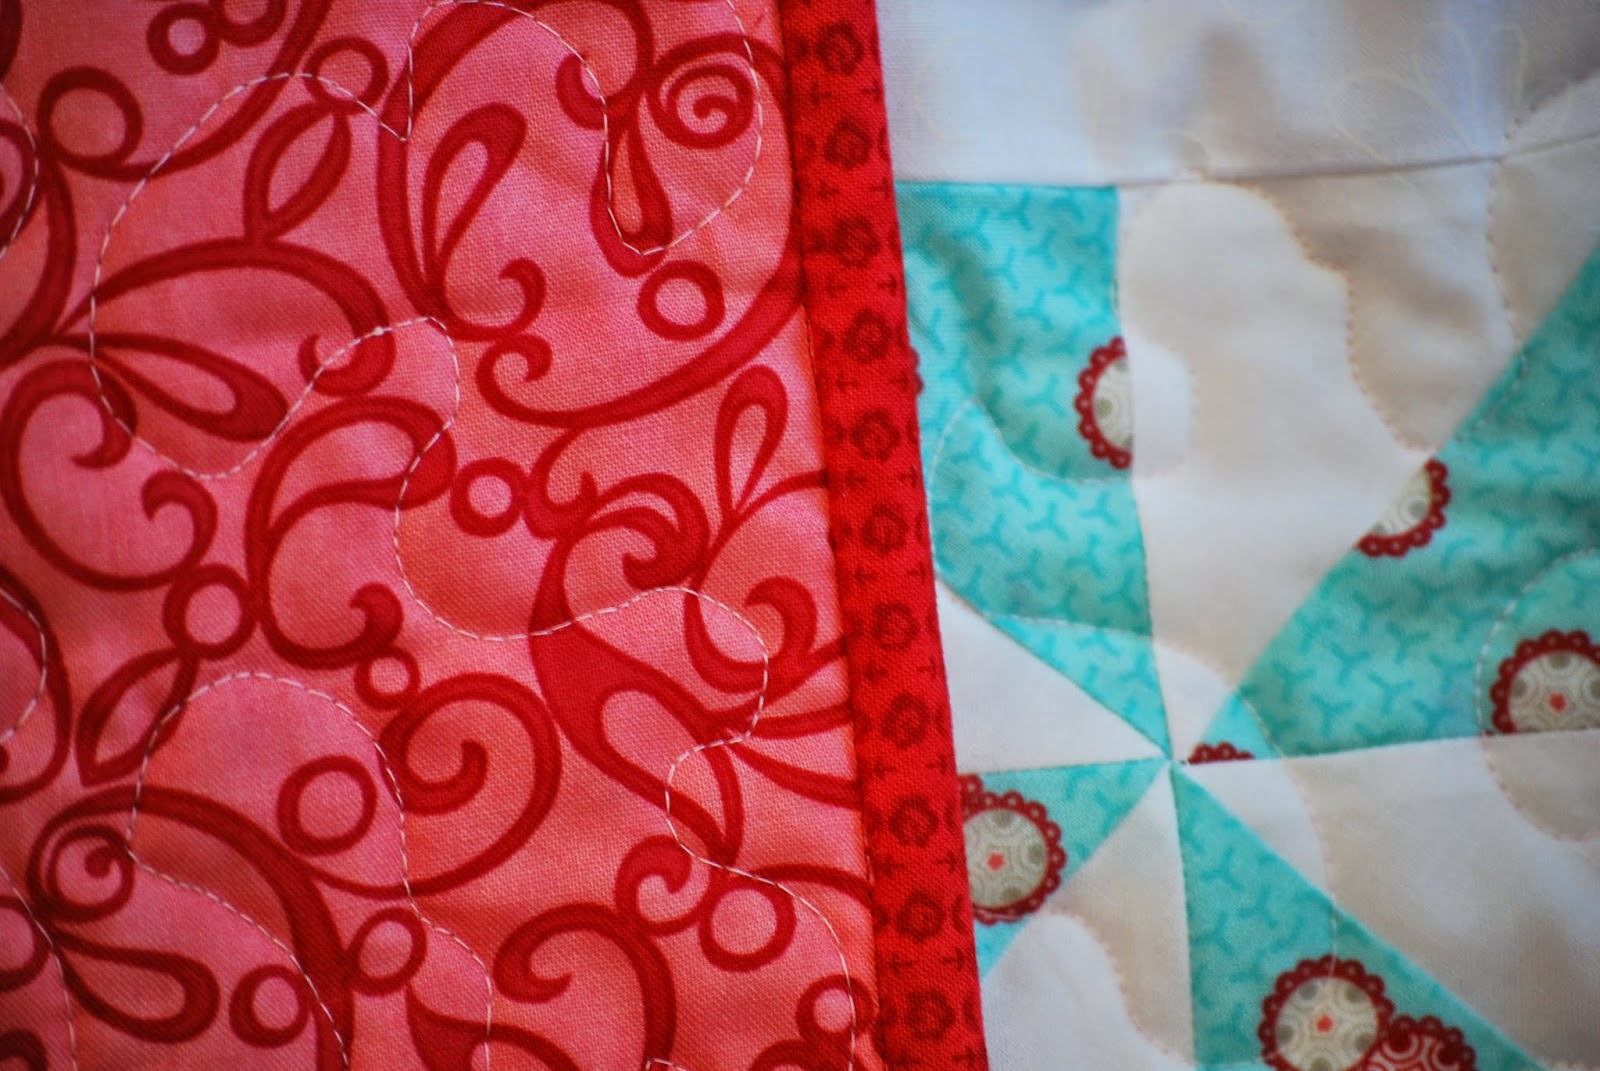
1. Top each of the charm squares with a solid white charm square, right sides together. Sew 1/4" around all four edges. Then slice across the squares on the diagonal with your rotary cutter.
2. Press each of these four pieces so the bulk of the seam is behind the colored piece, not the white. Place into a pinwheel design and sew them together. (Be careful to make sure that each of the pinwheels is facing the same direction or you will become more familiar with your seam ripper as I quickly learned.)
3. Using a six inch ruler, square up these pinwheels so that they are all 5-1/2" each.
4. Randomly arrange four rows of seven pinwheels in ieach row. Save thirteen for the second section. Two rows for section one, two rows for section three, and we'll get to Section three later where you'll need to arrange these also so that they appear to be random but in keeping with what you're doing in the other rows.
Side Note:
Using a 7 x 7 grid, with eight spaces left solid white, where you'll do the embroidery, I like to take colored pencils or even crayons of the colors I'm using - here it was red, grey, green, and blue, to make sure the colors are evenly distributed and just put a bit of that color down on each square of the grid. I check to make sure there aren't too many of the same colors in the same row or on top of each other this way. In this charm pack variety there were many more reds/pinks than the other colors. There were the fewest of green, so had I just pulled from my stash randomly, this might not have worked out as nicely.
5. Section One:
Starting with the top row, sew seven pinwheels in a row horizontally. Sew one of the 2-1/2" x 35 pieces to the bottom. Repeat this again. Now sew the two together; pinwheel, strip, pinwheel, strip
6. Section Two:
Take your (8) 5-1/2" squares and embroider a red heart in the center of them. I created my own pattern using a piece of cardboard that I lightly traced with a pencil. My heart measures 2-3/4" from top to bottom and a little less than 2-1/2" side to side. Then I went over it with two pieces of red embroidery thread, that I had checked to make sure wouldn't bleed. Center your hearts. Use any stitch you want. I used a back stitch for the embroidery here.
7. Starting with a pinwheel square, sew an embroidered square to its right side, then repeat, creating the pattern - pinwheel, heart, pinwheel, heart, pinwheel, heart, pinwheel
8. For the next row, sew two pinwheels together, then sew an embroidered square next to it on its right. Next comes a pinwheel, then an embroidered square, then two more pinwheels. The pattern is - pinwheel, pinwheel, heart, pinwheel, heart, pinwheel, pinwheel. Now that this row is done, sew it to the bottom of the first row you made with embroidered heart squares.
9. Repeat Step 7 exactly. Then sew it to the bottom of the row you created with only two embroidered hearts. This time add a 2-1/2" x 35" strip to the bottom, and now your middle section is done.
10. Section Three:
The next section is another seven pinwheels in a row, with a 2-1/2" x 35" white strip on the bottom, then another row of seven pinwheels is sewn together and attached to the bottom of your white strip.
Sewing on the Borders:
11. Next you'll sew the (2) 3-1/2" x 35" strips to the top and the bottom of the quilt. Both of these will be pinwheel rows.
12. Then you take your (2) 3-1/2" x 47" strips and sew them to the sides.
Finishing:
13. Now its time to put a batting and a back on the quilt. I used basting spray and that worked well for this small quilt, but you can baste it together however you'd like.
14. Quilt as you'd like next. I quilted 1/4" both inside and outside my embroidered hearts. The rest I free-motioned large stipples everywhere, but tried to leave some space around the hearts to let them stand out more. I also used a light pink thread for the quilting, so it didn't all fade to white, but it looks really pale still. Most people probably couldn't tell its pink unless you hold it close and look hard, but I like that pink thread is everywhere, as I wanted this to be mostly a red/pink quilt.
15. Last, sew on a folded 2-1/2" binding all the way around using whichever binding method you prefer then hand tack into place.
16. Make sure to label it on the back, especially if its going to a sweet baby that you love :-)
I'm off to share it with my quilt guild tonight.
If you have any questions or problems, leave me a comment, and I'll hopefully be able to help you.
Happy Quilting
No comments:
Post a Comment